
This pillow was made for a sweet girl that will be traveling home for the holidays. Who doesn't need a travel pillow that they can take along with them. I designed this pillow so it would slip over the pull up handle on a suit case. The pictures below will show you what I mean.


Cut the fabric the width of pillow plus 2" for seam allowance.

The length was cut long enough to cover the pillow
and overlap for the pillow flap.

Hem both ends of the overlap to finish off the ends.

The jean material was cut as wide as the pillow
body and doubled in length.
This will make more sense after you see the below pictures.

I cut a piece of the plaid to make a pocket to be attached later.

This is the jean fabric folded in half, pressed and
then meet the folds in the middle.
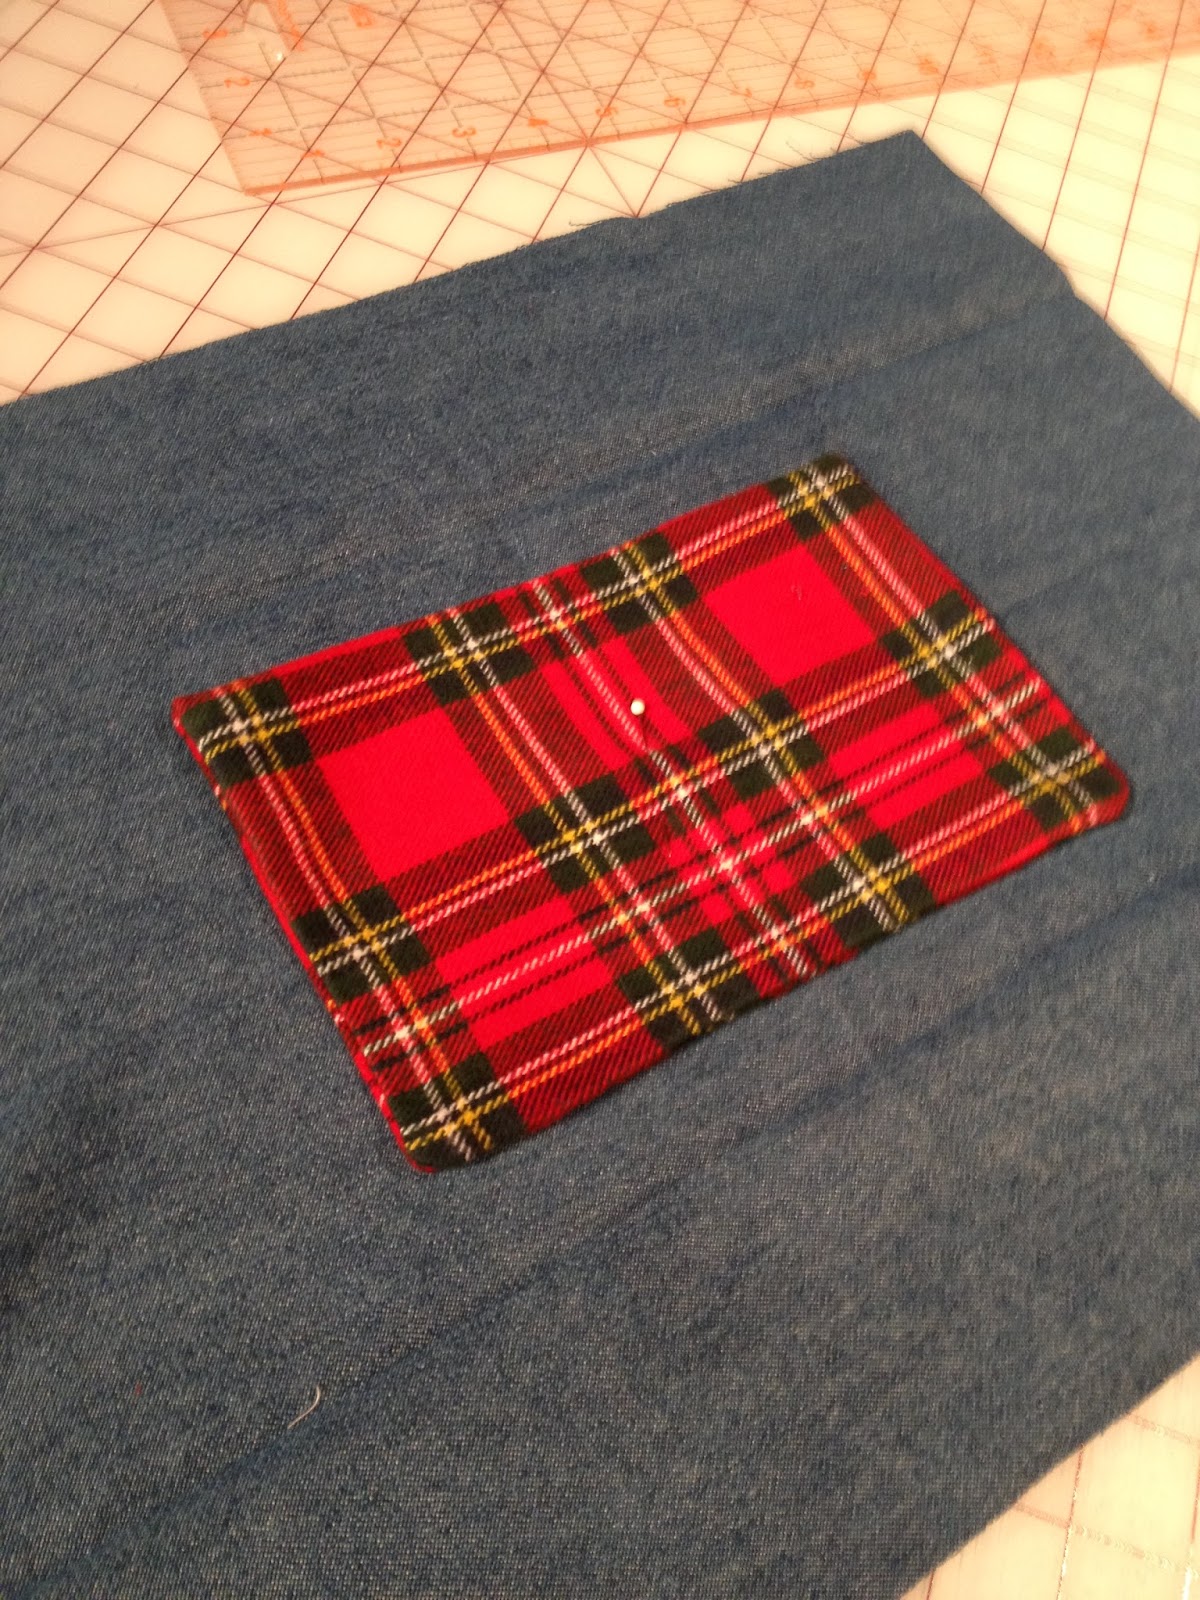
Stitch the plaid cut for the pocket wrongs side
together leaving opening to turn.
Turn right side out, press flat and center it on the jean fabric.
Stitch around three sides reinforcing the corners.

Put the jean fabric right sides together and stitch the long seam.
Turn and iron flat with pocket facing up.

Pin the jean pocket piece on to the back side
of the pillow just on the sides.
Stitch in place only on the back piece.

Insert the suitcase handle into the jean piece and pin so
the pillow back will slip over.
My suit case handle was wide so adjust accordingly.

Make a line with a disappearing fabric maker
and stitch in place on the back of the pillow piece.
I did a double row of stitching.
I also stitched a line across the plaid pocket to make two separate sections.

After the flap is attached fold the fabric over the pillow and pin.
Stitch both sides together and turn to right side.

Insert pillow form into the opening.
I added several Velcro pieces to hold
the pillow flap closed...OOPS no pics!
All finished...slip flap over handle and your ready to go!


