Friday, October 25, 2013

Fall HAIR-DO!

Fall is in the air and I decided I needed a do-it-yourself  HAIR-DO makeover!  I am very low maintenance where hair is concerned, I have NEVER had my hair colored with anything permanent!  I have always colored my own hair with Clairol's Natural Instincts hair color.  I have used this brand for about 20+ years so far and the last few years I have had to use it more often because it washes out in about 20 shampoos and shows my grey! There is a boost pack you can use after 2 weeks in the same box which extends the color.  There is also a conditioner in the box.   My hair is naturally dark brown or at least it was when I was younger.  I'm not real sure what natural is anymore, grey is taking over.  The color I used recently is 11G which adds a hint of auburn to my hair.  I have used N9 also, both are labeled in the dark blonde family.  My hair has a tendency to go red but that beats grey any day!  

The length of my hair is the longest it has been in years.  Most people start cutting their hair off when they hit 50+ but I think I am keeping my long hair.  I don't want to look like a teen but love all the things I can do with long hair.  The ponytail is my go to and not just a plain pony but one with a little teasing at the crown and a little bump..Pinterest Inspired Pony is my best friend these days when it comes to hair.  I rolled my hair today with my curling iron using this Pinterest inspired tutorial  Pretty pleased with the look...but I have to admit, it will most likely end up in a ponytail before the night is over.  
Habits are hard to break!  

Sunday, October 6, 2013

Baby Gifts....More MUSTACHE CRAZY PROJECTS!

The MUSTACHE projects continue!   These gifts go along with the "Backsac" I made for baby Cannon.
The gifts included a binkie holder ( I found the mustache pacifier at Kirklands), a baby wipe carrier, a "Shhh...Baby Sleeping soft hanger as well as a matching bag and card set.  I think I got carried away with the MUSTACHE thing!  
Mustache binkie....too cute! 
No tutorial...I used a suspender clip to attach the fabric strip and enclosed a 
piece of elastic on the other end to secure the binkie!
I examined one I saw in the store and made my version when I got home......
I know I am not the only one that does that......GO AHEAD AND CONFESS!

Visit A Lemon Squeezy Home for the diaper clutch tutorial.
I used a magnetic closure instead of velcro.
Really cute and simple but oh so handy!
Shhh....Baby Sleeping!
I thought this would come in handy to hang on the door.
I found the cutest mustache ribbon at Hobby Lobby.
I cut the monogrammed fabric as well as a lining piece into a mustache shape.
Insert the ribbon in the top middle and enclose it into the seam,
stitch around the edges leaving a small opening for turning.
Turn and press flat, stuff with fiberfill and stitch the opening by hand.
I finished it off with a mustache brad inserted into a button
sewn onto the ribbon.
 The bag needs to match the gift RIGHT!
Well in my world it does.....!
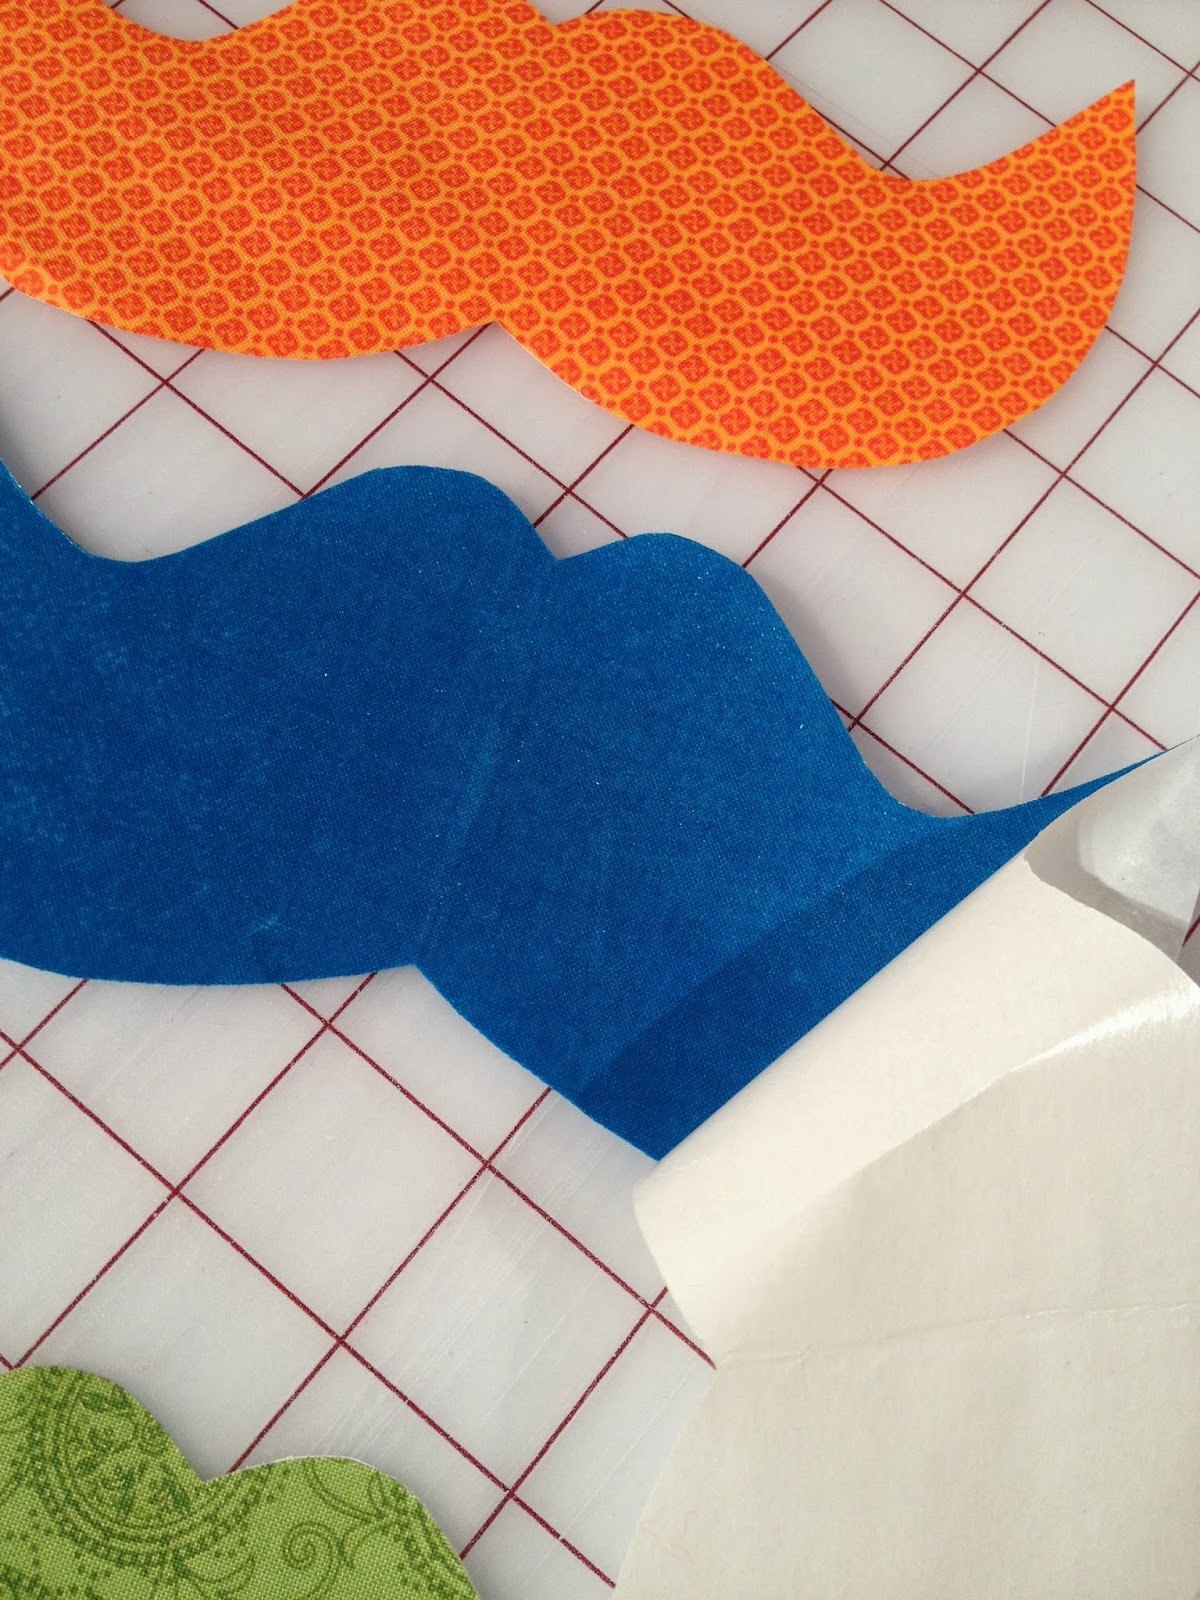
Iron Heat and Bond onto the back of each of your fabrics.
Draw your shape on paper backing and cut it out.
Mine just happens to be a MUSTACHE...!


 After cutting your shape peel off the paper backing.
 Lay your bonded shapes shiny side down onto your brown bag, 
(I found the bag with handles at Hobby Lobby)
lay a sheet of paper on the top and press firmly on all the shapes.


 Now you have a matching bag set! 
I did the same process with a brown card and matching envelope!
I used my MUSTACHE punch for the small shapes.
I tied ribbon to the top handle to finish it off
along with a small mustache tag in orange!
Ready for gift giving....!

Mustache Crazy!

I have fallen in love with everything MUSTACHE after doing this project.  Great little boy theme!

I started my hunt for the perfect fabric to make a gift.  I found the precious mustache print fabric at Hobby Lobby.   I also found a cute coordinating fabric in grey with small black dots.  I decided to add a little turquoise and orange to make it pop!  

I decided to make what I call a "Backsac".  This is the girly version I did awhile back ( Backsac tutorial ).
I made a few other gifts too. I will share those projects in another post.

The "Backsac" was made like the tutorial above with a few changes.
 I monogrammed the name on a piece of turquoise fabric 16" wide and then added my
 orange trim to both sides and stitched in place
 I then added my mustache fabric to both sides.  This is where you can decide how large
your bag will be.  I added 8" to the top and 10" to the bottom.
Cut a back piece the entire length of the front piece.
Cut 2 pieces of lining fabric (grey/black) and added 2" to the length. 
 Before stitching the sides of the outer sac, add a small loop of the cording 
at the lower corners, stitch in place and then square the corners by
cutting a small 1" square from the lower corner in order to made a boxed bottom.
Picture below shows the lining piece cut ready to be sewn.
Leave a 3" opening at the bottom of the lining 
to turn inside out later in the project. 
 Before connecting the sac and lining cut a piece of lining fabric with width of the bag
plus about 1" and finish the edges of this piece by turning them end and stitching in place.
 Fold this piece and press flat.
 Find the center and pin in place to the top of the outer sac.
 Repeat this for the other side.
 My helper Sadie isn't excited about my MUSTACHE project.....!
 After pinning the two separate pieces to top this is what it should look like.
This will be the pocket the cording goes into to draw up the bag.
It will make sense later on...keep going!
 Turn the outer sac (MUSTACHE FABRIC) to wrong side
and insert the lining(Grey) fabric into the sac and match the top edges.
Match top edges of sac and lining. 
 Stitch around the entire bag.
 Trim edges and get ready to turn.
 Turn through the opening you left in the lining.
 This is what the finished top will look like after turning.
The lining extends beyond the outer fabric.  
 Press everything flat and stitch around the lower grey piece
to help lining stay in place.
Finished sewing....ready for cording.
Lay cording out to make sure you have enough to go around the 
bag and down the side to the loop. 
Cut 2 pieces.
After cutting the cording burn the edges to keep them from fraying.
Be careful, it is like hot wax. 
Attach a safety pin to the end and guide the cord to the other side.
On to the other cord.  
Repeat the same process going the opposite direction.
 This is what the side should look like.  Two cords coming out each side.
 Extend your cording and go through the lower loop 
and make a knot.  Lay sac flat and make sure both sides are even.
Burn the knot to prevent it from fraying.
Finished bag ....Ready for baby CANNON!
Related Posts Plugin for WordPress, Blogger...