Thursday, June 30, 2011

POP of color!

I think we all could use a POP of color now and then....!  This project piece is in my sister's house...she just had her kitchen remodeled and added an extra bath (my husband is her contractor) it turned out SUPER!
After hanging this particular ironwork piece in her new bathroom she thought it needed something.......there's where the POP of color comes into play!!!
She thought backing it with a color would add some interest to the wall.  The project was really simple and quick!
Supplies....foamcore board
                 fabric
                 duct tape
                
We started the project by measuring the backside of the iron piece and cut the foamcorm to fit tight...push gently...foamcorm bends easily!  We then layed the fabric on the board and cut 1 1/2" bigger on all sides in order to fold the fabric to the back.  The duct tape held the fabric in place nicely...fold the corners like a gift package.  We then placed the covered board into the back of the iron hanging and just like that...she now has that POP of color she needed in her new bathroom!
It sure is fun to craft with your sister and we even had a little helper, Cate was our VANNA WHITE model for the finished look!  Thanks CATE...you did a super job!


Off to find something else that needs a POP.....!
Take a look at the entire remodel...Brian Builder's LLC!

Friday, June 17, 2011

Mirror Makeover!

Red has become a recurring theme color around here! I have had this mirror ($20 clearance from T.J. Maxx) for awhile and didn't know quite what to do with it until now. My daughter will be moving into her own apartment soon and her bedroom colors are going to be red, brown and turquoise. This mirror will find a new home from my stash closet to her bedroom wall after it's makeover.


I removed the mirror and spray painted it with gloss RED paint!
Replace the mirror and it's ready to hang!
Wish all makeovers were that simple!


Tuesday, May 24, 2011

Purse creations!

Something about a purse...you can never have too many!  These are just a few of the purses I have made...more to come I'm sure!


Just call me BAG LADY!


Sunday, May 22, 2011

Proud mom of a 2011 Honor Graduate!

High School Graduation for my son...I can't believe it's here!  My daughter graduated in 2009 and has been in college for 2 years and now my son will be leaving home to attend Full Sail University in Florida....uggg...
that's a long way from home! 
We had a wonderful day watching him graduate and celebrating with family afterwards!   I found his Time Capsule he made in 1st grade and he didn't even remember making it!  His first response about some of the papers inside was..."I sure couldn't spell!"  I had to remind him he was only in 1st grade.  He is so much smarter now that he is a GRADUATE!
I could not be more proud...great son....wonderful person and so talented!  His future is bright and I can't wait to see where life takes him.   I just hope it brings him back to me somewhere down the line...I am going to miss him so much!
 A collage of his senior pics along with his Graduation Robe with Honor Cords & 1st Grade time capsule!
 My wonderful children...I wish them a bright and wonderful future...you make me proud!

 Family celebration table!
His cake...Leaving high school and heading off to college!
A mat for family and friends to write a special message!
Airline High School Graduation...Senior 2011


Austin getting his diploma!
The traditional HAT throw...ON TO THE FUTURE!

Friday, May 20, 2011

Embossed Cards...great grad gift!

Another graduation gift idea....Embossed Cards!
Supplies...Cards with envelopes ( I ran mine through the computer and printed the name)
                Stamper
                Ink pad
                Embossing powder
                Heat gun
                Ribbon (tie around cards)

                                     
I love this little tray......found it at Michael's!


I stamped a plain brown gift bag from Target (the ribbon was already on the bag, 1.99)...
for an extra bit of CUTE!


Thursday, May 19, 2011

Towel Wrap !

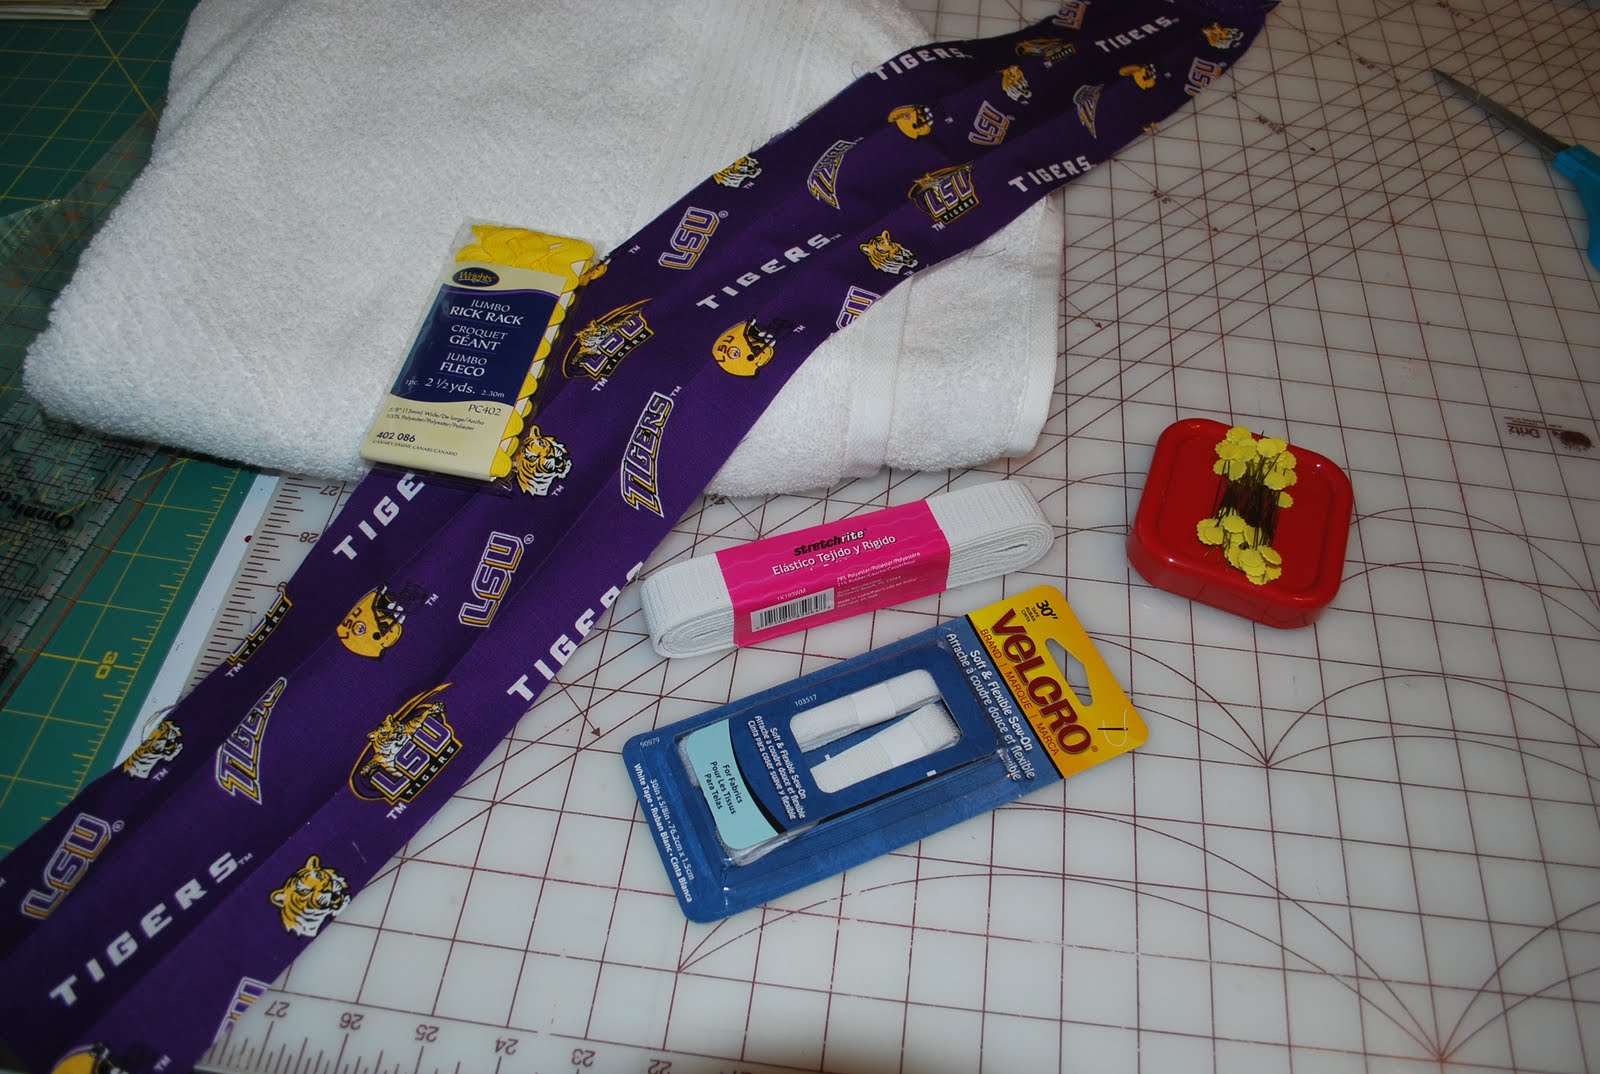
Graduation time = crafting time!  What does a college girl need...a towel wrap of course with school colors!  LSU is a favorite school in Louisiana...and that's where this little gift will end up.

Supplies:  1 bath towel ( lightweight works the best, less bulk to sew)
                1 piece elastic 1" wide 22" long (adjust acording to desired fit)
                Fabric for decorative strip down the front (mine was 32" long and 4" wide)
                     (Measure your towel length and add 1 1/2" for turning raw edges)
                1 fabric piece 42" long x 4" wide to make bow on final wrap
                Velcro 2 pieces 4" long
                 Ric Rac for decoration if desired (length of towel)


 Begin by folding the ends of the fabric to conceal raw deges and  iron it forming a piece about 2" wide.

 Finished piece ironed and ready to attach to towel edge.
 I folded it over the end of the towel (this will eventually be inside the casing area.
 Pin fabric down and stitch.
 Stitched and ready for the next step.
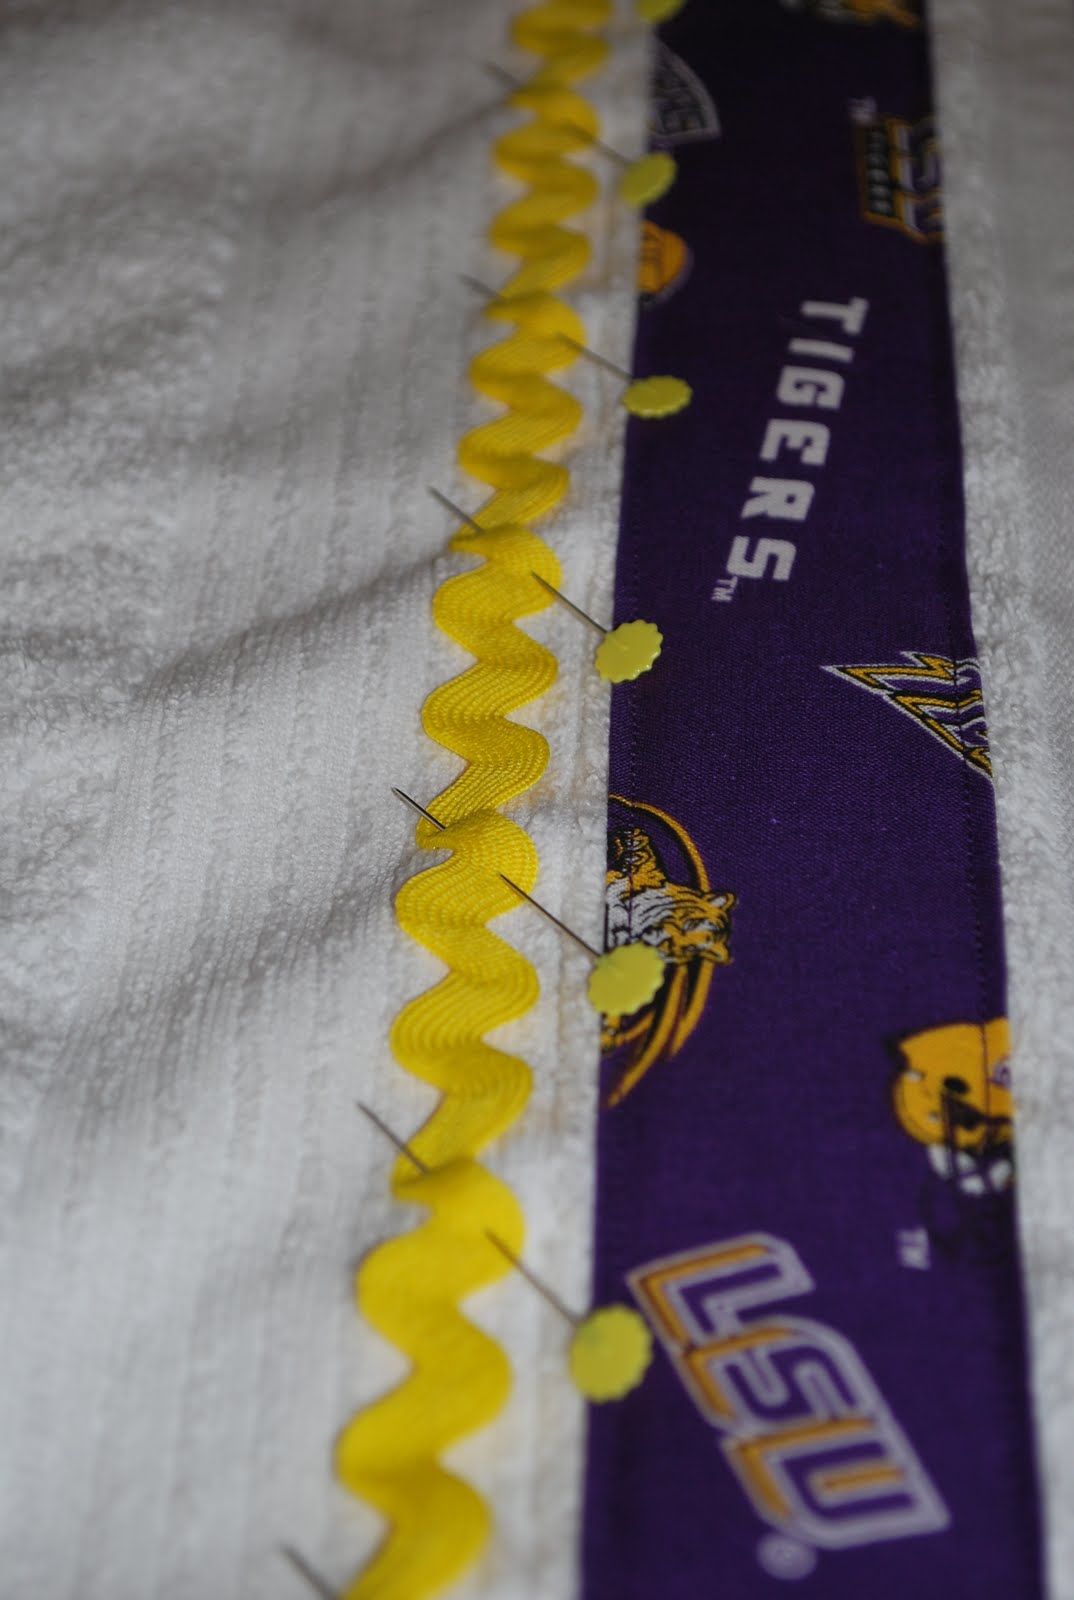
 I added the Ric Rac on one side just for some extra color!
 Bring the Ric Rac over the end just like the fabric (the bottom of the fabric and trim were sewn to finished
edge of towel.


Measure 2" and pin ...don't stitch at this point....(this will form the casing for the elastic )
 Attach one side of the 4" velcro onto the towel front top edge.
 Do not stitch the casing edge all the way across just yet..you will need an opening to put the elastic through.
 Pull your measured elastic piece through the casing and stitch across one edge to hold in place.
 Pull elastic up to desired length ( I put it on to see how tight I needed it to fit)
Once the elastic is in place, fold the towel down and stitch across the elastic area to hold in place.
Finish sewing the folded casing area at this time and attach the matching velcro to the other side matching the front piece.

 You are finished unless you want to add a little decoration to the top...mine was too plain so I added a bow.
 I cut a piece of matching fabric 42" long and made a tube, turned it and tied a bow.
 I sewed the tie onto the top of the towel wrap ...added that extra that it needed!


Now I need to wrap it up pretty and deliver it to the lucky GRAD!

Tip Junkie handmade projects


Tuesday, May 10, 2011

DIY Dish Birthday PRIZE!


The DIY Dish is having a Birthday and wants to give away lots of prizes to some lucky ducks!
Check it out and enter to win....I sure am!
The DIY DISH

Friday, April 22, 2011

Cruise Tip!

Clear Shoe Bag = Best Cruise Tip Ever!  The simple clear shoe bag you hang over the door was the best thing I brought on my cruise a couple of years ago.  I recently passed this tip on to a friend who will be going on a cruise soon and thought I would share.
I found my shoe bag at my local Walmart.  When I boarded the ship I hung the bag on the inside of the door in the VERY SMALL bathroom.  There is very little counter space and the bag becomes your hanging storage!
All the little things we use everyday from lotion to toothpaste, q-tips, hairspray, suntan lotion...and on and on fit neatly into each clear shoe compartment for easy access! 
The next best advice....get yourself some seasick bracelets and keep them on throughout the entire cruise!  Believe me, I learned the hard way!

Happy Cruising!


I am linking up with
Tip Junkie Tip Me Tuesday
all crafts Homemade Projects ~ Add Yours!

Thursday, April 21, 2011

Mark your SPOT!

It's a bookmark...ribbon...buttons...elastic hairband and there you have it!  I didn't come up with the original idea...wish I could remember where I saw it first but it was so simple and cute I had to share! 

I made it for my daughter's friend to mark her place in her drawing journal!  I also made a small envelope purse for her to carry her drawing supplies but didn't get a good picture but you can go to The DIY Dish and see the project...really simple and cute!  The purse slipped easily under the bookmark for safe keeping.


Supplies:   Ribbon( about 12-14 inches/any width would work)
                2 buttons (large enough to hold elastic band)
                1 hair elastic
Fold the cut edges of the ribbon on one end 1/4" to conceal the raw edge, fold again 1/2" and slip the elastic band into the fold before stitching the width of the ribbon.
Repeat the process for the other end excluding the elastic band.
Sew a button on both ends and place in book hooking the elastic band around the button.

Mark your spot with style...!

I have joined a newbie link party at DebbieDoos  Go check her blog out..lots of great ideas!
Related Posts Plugin for WordPress, Blogger...